

Table of Contents
Google Docs is the most used online word document editor. The versatility and ease of use of the tool make it the most effective tool in the market for sales and marketing people, and there is no doubt about that.
Creating a visually appealing and professional document is essential for conveying information effectively. One crucial aspect of document layout is setting the margins correctly. Document margins enhance the readability and overall aesthetics.
And if you are looking to understand how you can change Google Docs margins quickly, this blog will help you achieve polished and refined document layouts.
How to change Google Doc margins in page setup
Let’s start the customization of the Google Docs margin from the Page Setup Option. This is a step-by-step process for easier understanding.
Step 1
Open your Google Drive and launch the Google Docs document on your desktop browser. Once the document is open, look for the toolbar at the top of the page. Now, click on the ‘File’ option on the toolbar.

Step 2
From the many options you can see on the dropdown menu, look for ‘Page setup’ and click to see another small window pop up with many formatting options.

Step 3
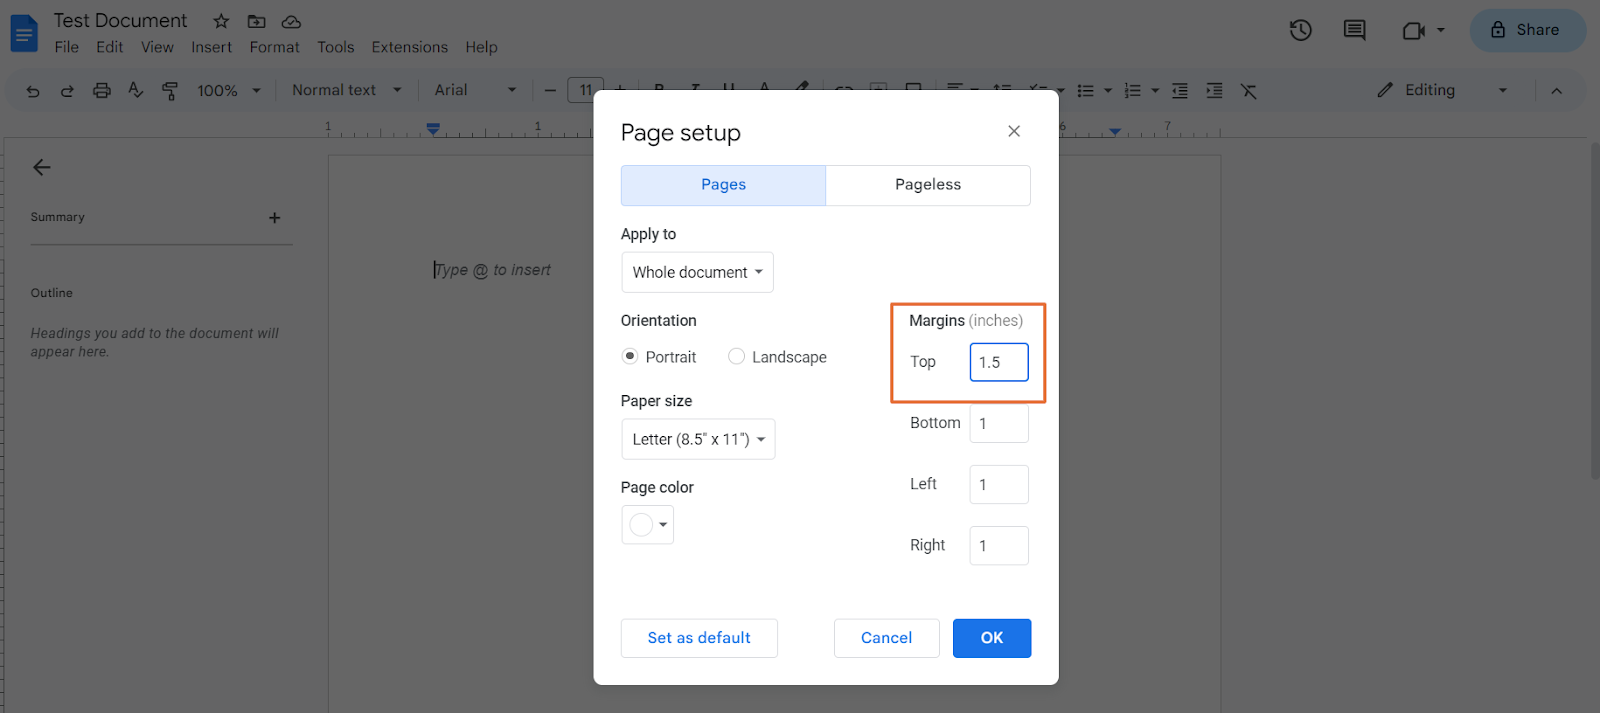
On the window, you can see ‘Margins’ on the right-hand side. You can change the margins as per your requirements. It has four options to change the margin at the top, bottom, left, and right sides of the document.

Step 4
By default, the margins are set to 1 inch, and you can change the same as per your preferred margin length. Simply click on the corresponding box, delete the existing value, and input your value to change the margins.
Step 5
Fill in your preferred margin in other boxes as well, if you need to do that. Once that is done, go ahead and click ‘OK’ for the effects to take place.

Step 6
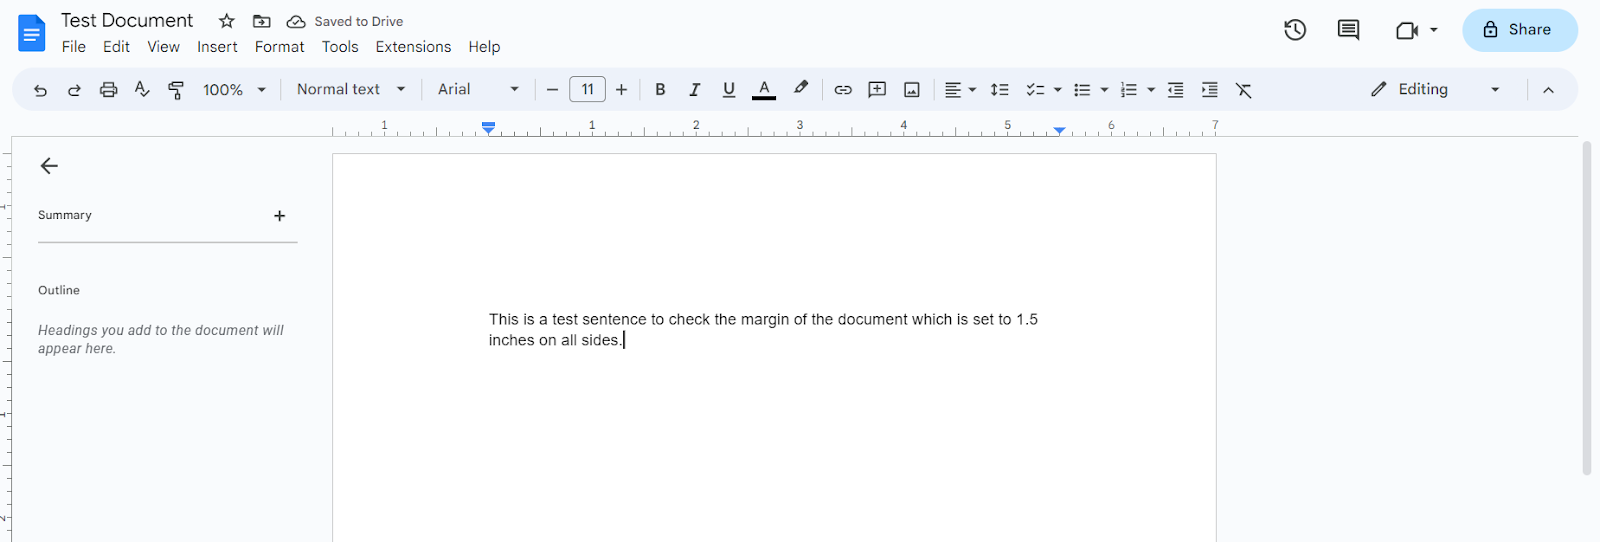
You can see the new margin on your document.
Step 7
You can see that all four sides of the document have a margin of 1.5 inches as we have set in the earlier step.
With this step, you will have successfully changed your Google Doc margins.
How to change Google Docs margin in ruler
This is another way to change the Google Doc margin based on your preferences. In this method, you can use the ruler feature, which is a more interactive and visual approach to changing Google Doc margins.
Let’s see how we can do that quickly here:
Step 1
Open the Google Doc document. You may not be able to see the ruler sometimes if the option is not enabled.

Step 2
In order to enable the ruler on Google Documents, click on the ‘View’ option on the top menu bar.
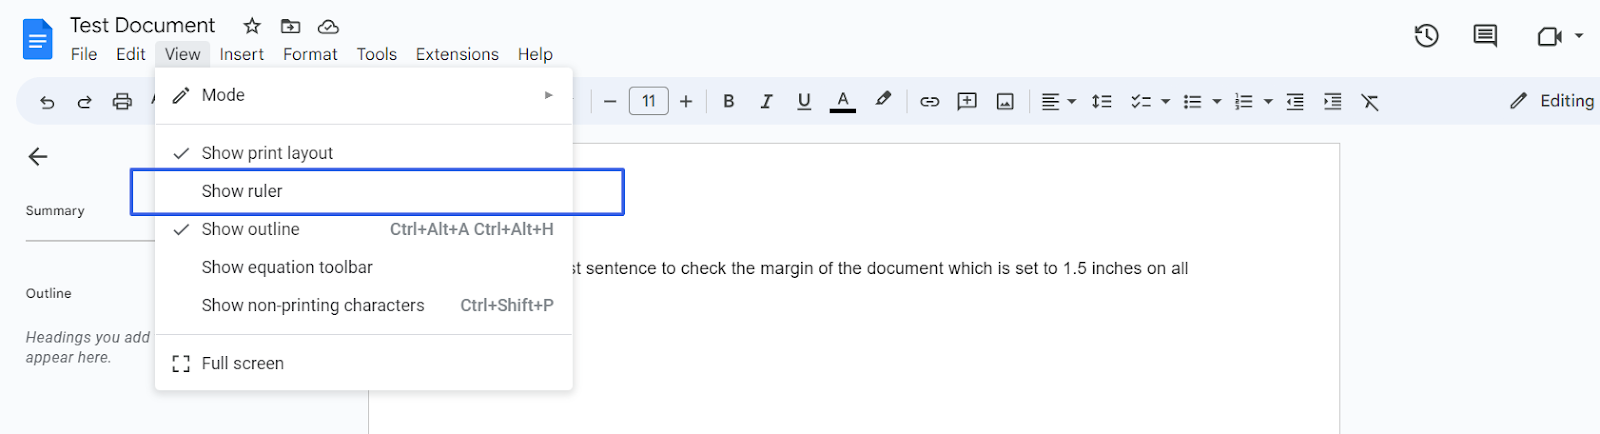
You can see that the ‘Show ruler’ option is unchecked. That’s why it is not showing on the document.
Step 3
Click on the ‘Show ruler’ option to enable it, and you will be able to see the Google Doc margin instantly on the document.

Step 4
Once the margin bars are visible on the document, you can start adjusting the same. As given below, you can see two blue margin indicators on the right-hand and left-hand sides of the document.

Step 5
Click on one of these indicators and drag it to the left or right side of the document to decrease or increase the margin. As you do it, you can see the margin changing in real-time.

Step 6
You can also do the same for the right-hand side of the document. After moving these indicators as per your preference, leave them to set the preferred margins for the current document.

This is the step-by-step process to change Google Doc margins using the Ruler feature on the document.
Conclusion
Everyone who uses Google Docs knows that margins can make documents more effective for data sharing, communication, and marketing. However, we hope that this blog has been able to clear up your confusion around this.
As a good team player, share this guide with your coworkers and help your employer improve the overall performance of your company.
